Fixing My Rowing Machine
last updated 2026-03-05 20:40:39 by Simon Vandevelde
Somewhat on a whin last year, I decided to buy a water based rowing machine to use in my workout routine.
Rowing seemed like a fun change, and it's also apparently "one of the best cardio workouts" according to some sources as it's full-body but low impact.
The specific rower that I bought is a Cardiff R370, bought second-hand for a good price.
Unfortunately, sometime in the last months the machine started leaking from the water compartment.
Initially, it would only leak after a workout, and in small quantities.
While this seemed managable, it didn't take long for the leaking to worsen, with water coming out at a steady pace.
It would only stop when the machine was put in the upright position, meaning it had to stay like that until it could be fixed.
The machine itself is only 5 years old, but out of warranty, and thus the makers wouldn't/couldn't help me.
They did give me the number of a local maintenance company, but I'm fairly certain they would've asked more money to repair the tank than I had paid for the entire thing.
So I did what any good engineer would do, and I stubbornly tried to fix it myself!
Fixing the issue
Here's a picture of the tank when the rower is in the upside position.
Do you spot the issue yet?
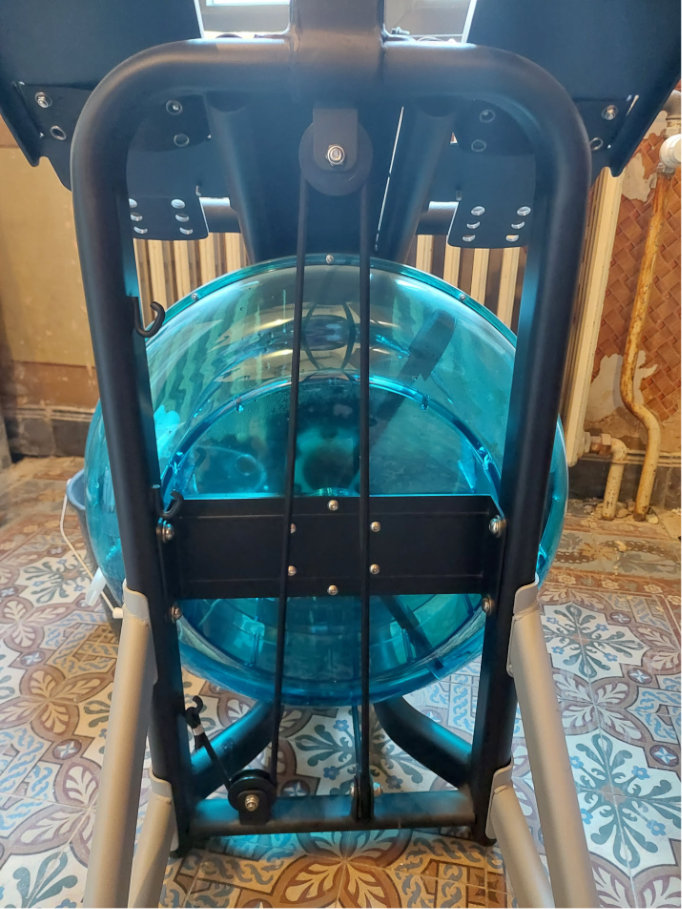 Ignore the background; we are renovating. :-)
Here's a closer look at where the center bracket connects to the rower.
Can you spot it now?
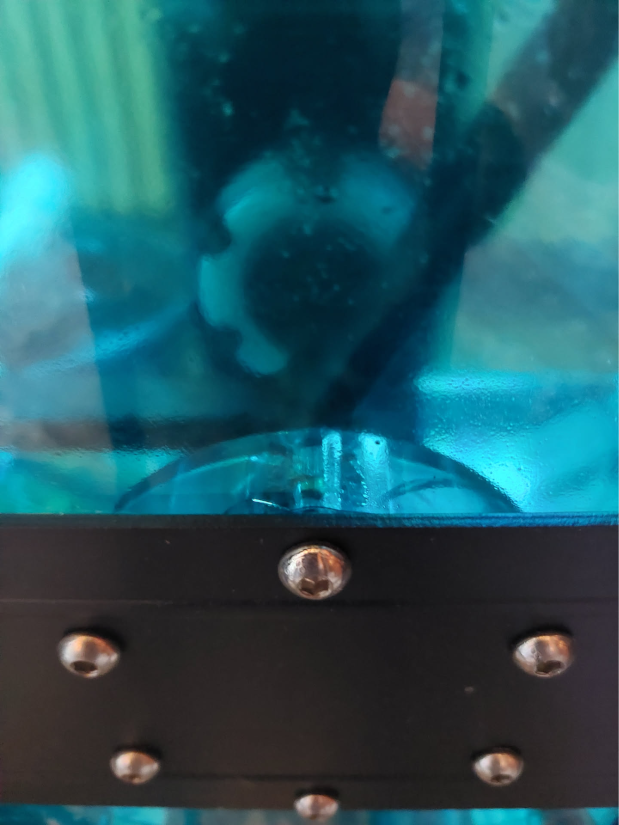 The tank has a small hairline crack above the bracket.
Aha, a small hairline crack! This must be the culprit, right?
But, you might be wondering now how such a small crack can leak so much water.
I figured there'd be one or two more similar cracks behind the bracket, and decided to empty the tank so that I could take it off.
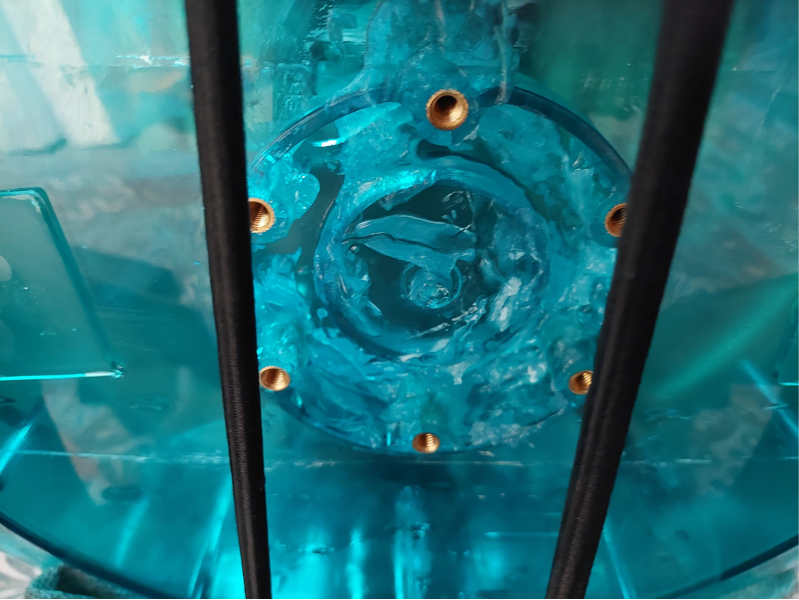
Here's an image from above, after taking the water out:
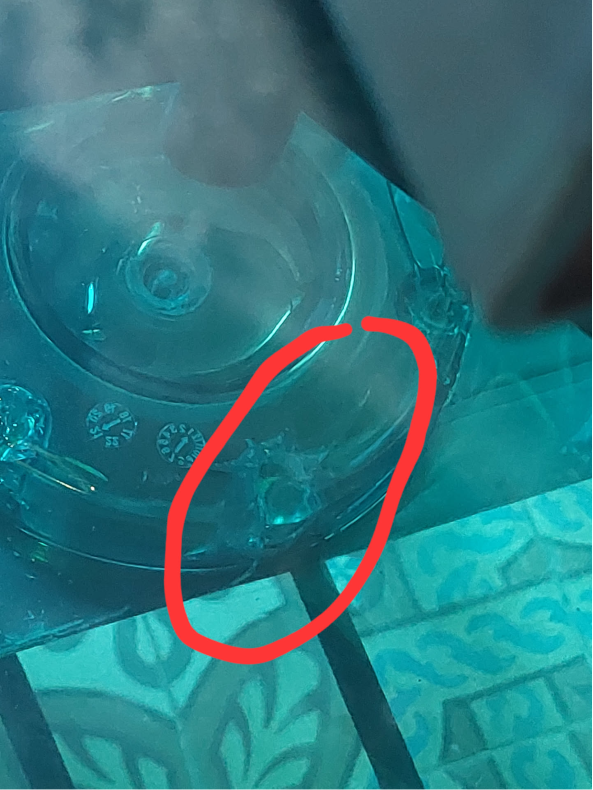 The rower came with a handy tool to take the water out without making a mess. :-)
Uh-oh!
While we can see the same crack now from the other side (as highlighted in red), there's actually many more cracks visible in this image.
After taking off the bracket, I could finally see them from close by.
Seeing the cracks briefly made me lose hope, but again, I stubbornly carried on.
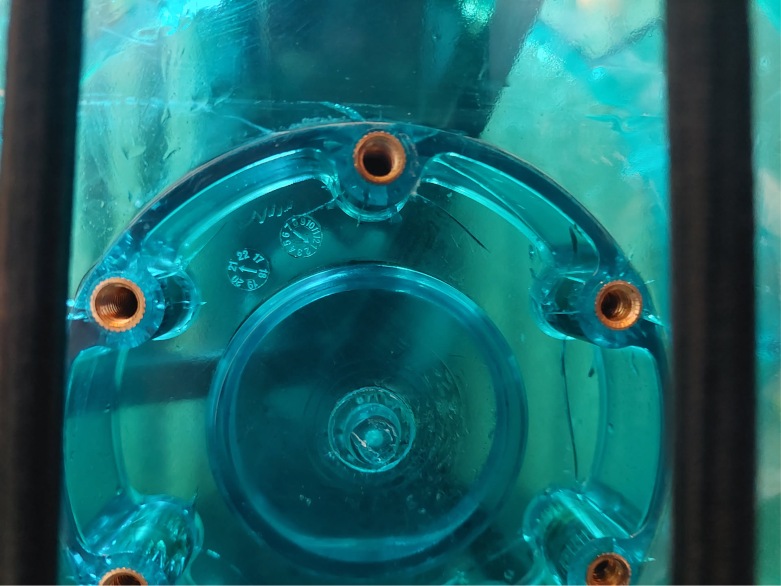 A frightening sight.
So here's the plan: I decided to try and glue the cracks shut.
Using knowledge from a previous industry use case I worked on (and a quick verification by an adhesive expert), I chose to use a cyanoacrylate from a local DIY store to seal them up, as this should probably work well on the acrylic material of the water tank.
Here's a slightly-out-of-focus "after image" of this operation:
Turns out gluing without actually attaching anything is hard, so the job is quite messy. :-)
For good measure, once the cyanoacrylate had fully dried, I also applied a 2-component epoxy as an additional layer.
This epoxy was specifically marketed for marine use, so it seemed like a good addition.
The result
The machine stopped leaking, so it would seem that my fix works!
Knock on wood, however, as I have not yet had the chance to actually row again.
It's possible that the vibrations of the machine unseal the cracks, or that more cracks start to appear.
I'm not sure why it started cracking in the first place, but I'm hoping it was just down to bad luck.
Hopefully my patch job will be sufficient to get at least another year out of the machine, after which I can always try to glue it again. :-)